Tuesday, May 24, 2022
Smith & Wesson M&P22 Compact 12 +1 Follower
Monday, August 2, 2021
AR10 / AR15 Ejection and Feeding Problems Solved (Carrier Tilt)
I have been trying to get my AR10 chambered in 308 to cycle reliably for a few years now. Keep in mind that I have been working on this is my spare time and weather permitting. Additionally it has not been a high priority since I hunt with the 6.8SPC and use the 5.56mm for competition and coyote hunting. OK off topic crap done, now to the details in case you found this article desperately searching for a solution and got tired of wading through crap in the forums and youtube videos that NEVER seem to stay on topic.
MY SETUP
I built this billet AR10 upper and lower receiver using DPMS parts kit, DPMS BCG and a Bear Creek Arsenal 16" 1-10 twist barrel with mid-length gas system. Before you look at my pictures and think "Hey! That looks like an Armalite patterned upper and lower, why are you using DPMS parts?" This matched upper and lower is made by AES Weapons and they designed it to look like an Armalite pattern but use the more common DPMS parts. SIDE NOTE: if you were confused about Armalite vs DPMS, I just made it a bit worse for you.
Since I am going to be shooting this primarily suppressed, I installed an adjustable gas block so I could reduce the amount of gas cycling the BCG. Suppressors increase the gas pressure and can induce feeding and ejection problems, as well have potentially damage parts or premature wear on parts.
THE PROBLEM
So what I was running into was failures to feed/eject no matter what type of ammo I was using. Magazine type did not make a difference. When I removed the upper from the lower I could see where the black anodizing was gone and what appeared to be "dents" in and around the opening of the buffer tube. So I got my Dremel tool out and removed some of the material where this damage was occurring thinking there may be a design flaw in the lower. The issue still persisted... I even removed some material from the mouth of the buffer tube since it had gotten dented too. Still did not fix the problem.
Even with the gas block turned down, I figured it must be getting too much gas and the BCG is moving way to fast backwards and not giving the spent brass casing time to "shrink back down to size" for a smooth extraction. If the BCG starts rearward too fast before the gas pressure in the chamber has time to normalize, the brass casing is still swelled inside the chamber walls and can "stick" causing friction that impedes the extraction... inducing a failure. The typical solution for this is a heavier buffer like an H2, H3 or tungsten. The idea is to add weight to the BCG and slow it down giving time for the chamber pressure to normalize. Another solution is an increase power or heavier recoil spring. I tried both buffer and spring and the problem still occurred.
THE SOLUTION
After searching all over for an example of the damage I was seeing... and not finding it, I had two options. Replace this bad ass super tight upper and lower set or try an "enhanced" buffer tube that I occasionally saw on the internet but the reviews and marketing hype never mentioned the damage I was seeing. I was prepared to dump another $50 for a stupid buffer tube if it fixed the problem but was happy to find the Aero Precision Enhanced Buffer Tube cheaper for about $33 at Primary Arms. So I opened the wallet and spent more money. My next trip to the range was a success! I ran the same ammo that never ran 100% in this rifle and all of it cycled perfectly.
HOW THE ENHANCED BUFFER TUBE WORKS
So if you look at the pictures, the enhanced buffer tube has an extended portion at the bottom called "Carrier Support Extensions". This extension to the novice like myself looks like a nice feature to help keep that buffer detent and spring from shooting across the room. However the real feature of that extended portion is to allow the rear portion of the BCG to rest on it and act as a guide into the buffer tube. Pretty much like how a shoe horn works on shoes.
Thursday, June 17, 2021
Using 1911 Recoil Springs in your Sig Sauer P320
Friday, May 24, 2019
Changing Grip Screws on Your 1911-22 Pistols

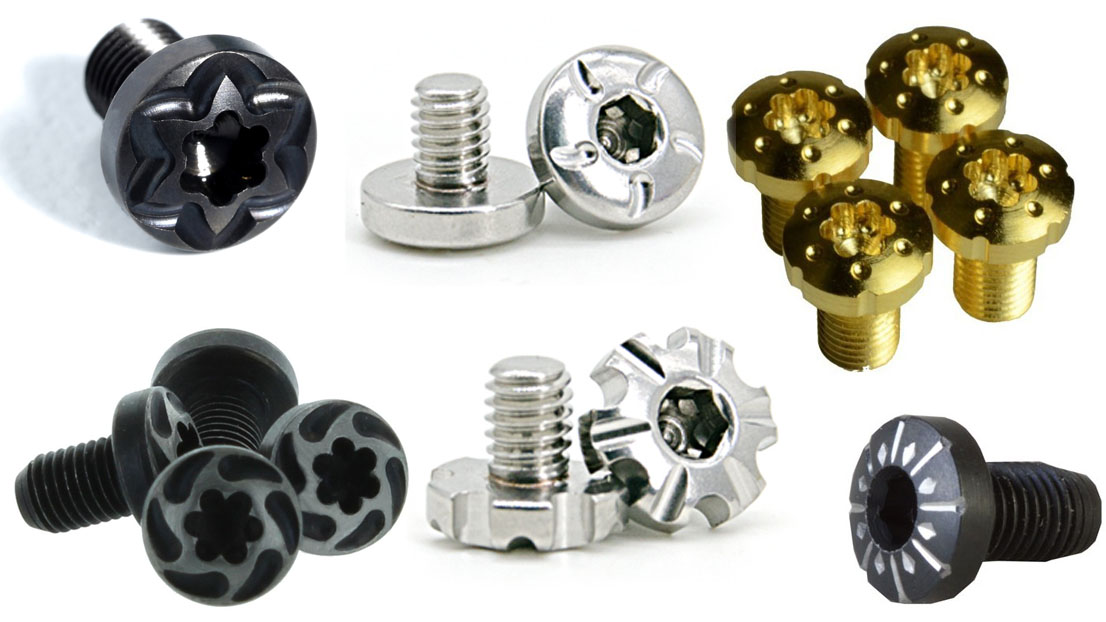
The NicTaylor00 Grip Screw Bushings are specially made to adapt the metric thread pattern on the frame of the gun to the standard thread pattern of 1911 grip screws. By replacing the Bushings found under the grips, the options are endless. Standard 1911 grip screw bushings will NOT WORK on the Colt 1911-22 and the Sig Sauer / GSG (German Sport Gunworks) 1911-22LR pistols.

You can get your Grip Screw Bushings for either the Colt Rail Gun, Gold Cup, Government or the Sig Sauer / GSG 1911-22 imported by ATI at 22LRupgrades.com


Friday, May 10, 2019
AR15 / AR10 Flat Match Quality Trigger for $30!

The Flat Straight Trigger itself is designed to reduce the perceived pressure exerted on your trigger finger making you feel less pressure for each trigger pull.


Adding Reduced Power Springs will give the shooter even a lighter trigger pull. No too mention the trigger itself looks great in the gun.


With drop in match triggers starting at over a hundred dollars, this Skeletonized Trigger with reduced power springs with a price tag of $30 is a great drop in solution for those of us on a budget. You can get yours at Taylor Tactical Supply and don't forget to use the Free Shipping Code GUNSTREAMER for free shipping on your order.
Friday, May 3, 2019
16 Round Magazine Kits for the Smith & Wesson M&P22 COMPACT
For those of us with larger than normal hands, you may find the COMPACT grip a bit small. The added length of the basepad gives your paws more surface area to grip on.
The M&P Compact 22LR pistol uses the little button the side of the factory magazine to engage the slide lock on the pistol. That means when the factory magazine is shot empty, the little button makes the slide stay open on the gun. When you install the 16+1 magazine kit you no longer use that little button so the slide lock on the pistol will not work. However, the NicTaylor "locking follower" is designed to engage the bolt face of the pistol when the mag is empty and thus lock the pistol open. This is similar to how the AR15 22LR conversion kits work. The down side to this is that the mag will not drop free since the slide is resting on the follower. You will have to either pull the slide back and manually engage the slide lock or just push the mag release and pull on the magazine at the same time. If you do not like the locking feature of the kit, you can choose the "non locking follower" that does not engage the bolt face. When the gun is empty, the slide will close and the mag can be dropped free.
If you have bought the 14+1 Magazine Kit for the M&P Compact and want to upgrade to the 16+1 kit, you can get the basepad on it's own and simply replace the factory basepad.
Remember, these kits are for the M&P-22 Compact and not the full sized M&P22. You can get 15+1 and 17+1 magazine kits for the full sized M&P22 at Taylor-Tactical-Supply
Thursday, December 20, 2018
Smith & Wesson 18+1 High Capacity Magazine Modification
But here in particular I wanted to give you a close up look at the 18+1 MAGAZINE UPGRADE KIT for the Smith & Wesson M&P22 pistol. This kit replaces the internal parts of the factory magazine regardless if it's a 10 or 12 round mag. The kit is comprised of a new Hi-Viz follower, extra power magazine spring, aluminum basepad and hex wrench. You can find them HERE

The kit installs in minutes and is reversible if you want to ever convert your magazines back to original configuration. Simply dismantle your factory magazine and bag up everything for storage but the magazine tube. Insert the NicTaylor follower into the magazine tube and then the extra power magazine spring taking note of the orientation of the spring. Compress the spring inside the magazine tube and slide on the anodized aluminum basepad. If for some reason the basepad does not slide on, it may be necessary to remove some of the metal on the little wings of the magazine tube. The magazine tube is stamped and formed sheet metal and the tolerances can vary from mag to mag. Make sure that the spring fits into the inside pocket of the basepad and use the included hex wrench to finger tighten the set screw on the bottom of the basepad.


Draw backs on a kit like this is that it may not be legal in your area. Lots of states and municipalities do not allow magazines over a certain capacity. So make sure you know your areas laws before you install a magazine upgrade. Also we recommend using high velocity ammo for this kit. With so many rounds in the magazine, there is more pressure exerted on the bottom of the slide. This pressure is difficult to overcome as the slide attempts to cycle with the use of some low power ammo. Even with high velocity ammo, the slide may not lock back every time on the last shot fired.
If you live in an area where 15 rounds is the limit for a magazine then you are still in luck. You can get the original 15+1 magazine upgrade HERE And for those that do not have the full sized version of the M&P22, but rather have the COMPACT, you can get a 14+1 magazine upgrade HERE
Thursday, September 13, 2018
Smith & Wesson M&P22 Thumbsafety Removal
You can get yours HERE Use code GUNSTREAMER for free shipping in the USA

*Altering your gun including safety features may void the warranty and can be dangerous. Proceed at your own risk.


Tuesday, July 24, 2018
Dillon Reloading Press Powder Thrower Finger Adjustment Knob

Each finger adjustment screw comes with a slightly thicker washer than what came with your Dillon Powder Thrower. When installing the screw you can use the existing washer and wave washer (tension washer), or use the new one to get the knob tension to your liking. In some cases you may need to use both.

The screw will work on both the large and small powder bar found in your Dillon powder throwers for the 1050, 650, 550, SDB and 900 reloading press. You can get yours at Taylor-Tactical-Supply EBAY or Amazon

Thursday, May 17, 2018
Diamondback Truck Bed Cover Review
What immediately attracted me to the Diamondback cover was the rugged look and the ability to support a claimed 400 pounds. This is a great feature for me, since we usually stand on the side beds of our trucks or tonneau covers to fill deer feeders on our Texas deer leases. Standing on a color matched tonneau cover is not the best thing to do since the paint can be easily scratched and the weight of a full grown adult plus 50 pound bags of corn can damage the cover.
Constructed of diamond plate aluminum, the Diamondback can be purchased in either a glossy bare metal finish or a black spray on finish. I selected the black finish since it goes better with my grey 2017 Toyota Tundra. I was assured by the sales person on the phone that the spray on coating would hold up over time. The coating is claimed to be the highest quality spray on coating you can get when it comes to spray in bed liner material. I've seen so many truck beds with chalky bed liners degrading in the elements that I can only hope Diamondback is correct with this claim. Only time will tell, and having mine for year now at the time I write this review, it shows no sign of degradation.
I selected the DiamondBackSE model due to the door panel configuration. Other models like the 270 and 180 are geared more for tool boxes and I would mainly be hauling guns and ammo. I passed on the HD (Heavy Duty) version of the cover since I would not need the extra strength and the additional $400 up-charge for the HD.
Being a dude, I still have a collection of tools that are used on a semi-regular basis but not for my occupation where half my truck is tools. So I ordered the SIDE BOXES tool boxes for my bed cover. The side boxes are small and mount up above the bed so they do not take up any floor space. For me they provide the perfect amount of space for my tools and tie down straps.
The cover went on very easy for one person. The SE model is in 3 panels, two doors and one mid section that clamps to the bed rail of your truck. The mid section is the only section that requires tools to install and remove. The door panels come off easy and weigh around 40 pounds each. Having the ability to remove the door panels is a huge plus for me. When you need to haul something tall, they can be removed by just one person. My last fiber glass cover required another adult to help and then the problem of storing the huge cover without scratching the paint was a problem.
Since the mid section is relatively permanent, I figured it would be a great place to mount some lighting. These bed covers are really dark on those early morning hunts when you are trying to gear up before the sun rises. I found some water proof LED light strips on the web that run on 12VDC and figured they would be perfect for the 12V electrical system on the truck. Since my Tundra had bed lights already (I wanted more), it was easy to tap into the bed lighting wiring so the new LED strip lights come on at the same time. Click HERE to see a link to the LED lighting I used.
THE CONS...
I installed the cover in the summer sun and had to use gloves to handle the metal panels. The silver under side was impossible to touch with bare hands while adjusting the fit. Once closed up, the summer heat and sun heated the contents of the bed as if it was in the cab of the truck. As mentioned my last bed covers were fiber glass with carpet on the underside. Over heating was not an issue with that design.
WATER TIGHT?
My other issue was the middle panel on the SE model that clamps to the side of your bed. I must have over tightened the bolts since the two folding doors sit up at an angle and prove difficult to close and get a good water tight seal (see pics). This must be a common theme since I see pretty much every other Diamond Back cover on the road looking the same.
LOCKING RODS
The locking rods have a plastic sleeve on the ends where they engage the under side of the truck bed. In order to get the door panels to seal nicely, you have to get the end of these rods snug against the bed rail. In my case the rubber sleeve slides off the rod just enough to not allow the door panel to open. In some cases the rubber sleeve slide all the way off and would not stay on (see pics). Getting these rods just right can be difficult. Once they are adjusted you are good to go. BUT once you put some weight on the bed cover, the door panels tend to flex some and cause the adjustment of those rods to change. Not a super big deal since you can open the door panel and grab the corners and flex the panel back with your hands.
CONCLUSION
I tend to focus on the negative aspects as I see it since you assume the product marketing fanfare is all true. With that said, I can stand on this cover with confidence knowing that I will not jack anything up. Locking up my gear (mostly guns) in such a secure cover gives me piece of mind, knowing my weapons and gear are secure when I stop at that road side cafe after a day at the range.
Out of 5 stars I give it 4 just because of the negatives I mentioned above. And as long as you can live with the negative points I mentioned, I think you will not be disappointed. I would recommended this cover to others with my main complaint being the heating of the contents. So far no ammo has cooked off in the Texas heat.
Friday, October 27, 2017
Bump Stock "Slide Fire" Bump Fire Stock Review
In my opinion, the stock is a fun device to have in your collection. However it can burn through ammunition quickly and drive up your shooting budget. Operating the stock takes some practice which translates into even more rounds sent down range and less money in your pocket. When shooting, you need to focus on the forward pressure on the upper. Too much or too little will cause the rifle to stop firing. The pressure on the upper in conjunction with attempting to keep your sights on target create more things to think about that when shooting semi auto rifles and carbines. In-fact I find shooting the bump stock more cumbersome than shooting a full blown Class 3 Machine gun. But with the price tag associated with a civilian buying a legal fully automatic gun, the bumpsfire stock is as close as you can get for a great price.