NicTaylor's R&R (Review & Recommendations)
Please visit our Website! www.Taylor-Tactical-Supply.com
Tuesday, May 24, 2022
Smith & Wesson M&P22 Compact 12 +1 Follower
Monday, August 2, 2021
AR10 / AR15 Ejection and Feeding Problems Solved (Carrier Tilt)
I have been trying to get my AR10 chambered in 308 to cycle reliably for a few years now. Keep in mind that I have been working on this is my spare time and weather permitting. Additionally it has not been a high priority since I hunt with the 6.8SPC and use the 5.56mm for competition and coyote hunting. OK off topic crap done, now to the details in case you found this article desperately searching for a solution and got tired of wading through crap in the forums and youtube videos that NEVER seem to stay on topic.
MY SETUP
I built this billet AR10 upper and lower receiver using DPMS parts kit, DPMS BCG and a Bear Creek Arsenal 16" 1-10 twist barrel with mid-length gas system. Before you look at my pictures and think "Hey! That looks like an Armalite patterned upper and lower, why are you using DPMS parts?" This matched upper and lower is made by AES Weapons and they designed it to look like an Armalite pattern but use the more common DPMS parts. SIDE NOTE: if you were confused about Armalite vs DPMS, I just made it a bit worse for you.
Since I am going to be shooting this primarily suppressed, I installed an adjustable gas block so I could reduce the amount of gas cycling the BCG. Suppressors increase the gas pressure and can induce feeding and ejection problems, as well have potentially damage parts or premature wear on parts.
THE PROBLEM
So what I was running into was failures to feed/eject no matter what type of ammo I was using. Magazine type did not make a difference. When I removed the upper from the lower I could see where the black anodizing was gone and what appeared to be "dents" in and around the opening of the buffer tube. So I got my Dremel tool out and removed some of the material where this damage was occurring thinking there may be a design flaw in the lower. The issue still persisted... I even removed some material from the mouth of the buffer tube since it had gotten dented too. Still did not fix the problem.
Even with the gas block turned down, I figured it must be getting too much gas and the BCG is moving way to fast backwards and not giving the spent brass casing time to "shrink back down to size" for a smooth extraction. If the BCG starts rearward too fast before the gas pressure in the chamber has time to normalize, the brass casing is still swelled inside the chamber walls and can "stick" causing friction that impedes the extraction... inducing a failure. The typical solution for this is a heavier buffer like an H2, H3 or tungsten. The idea is to add weight to the BCG and slow it down giving time for the chamber pressure to normalize. Another solution is an increase power or heavier recoil spring. I tried both buffer and spring and the problem still occurred.
THE SOLUTION
After searching all over for an example of the damage I was seeing... and not finding it, I had two options. Replace this bad ass super tight upper and lower set or try an "enhanced" buffer tube that I occasionally saw on the internet but the reviews and marketing hype never mentioned the damage I was seeing. I was prepared to dump another $50 for a stupid buffer tube if it fixed the problem but was happy to find the Aero Precision Enhanced Buffer Tube cheaper for about $33 at Primary Arms. So I opened the wallet and spent more money. My next trip to the range was a success! I ran the same ammo that never ran 100% in this rifle and all of it cycled perfectly.
HOW THE ENHANCED BUFFER TUBE WORKS
So if you look at the pictures, the enhanced buffer tube has an extended portion at the bottom called "Carrier Support Extensions". This extension to the novice like myself looks like a nice feature to help keep that buffer detent and spring from shooting across the room. However the real feature of that extended portion is to allow the rear portion of the BCG to rest on it and act as a guide into the buffer tube. Pretty much like how a shoe horn works on shoes.
Thursday, June 17, 2021
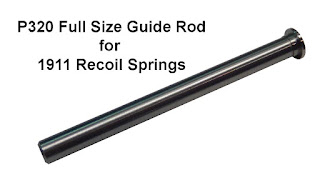
Using 1911 Recoil Springs in your Sig Sauer P320
Friday, May 24, 2019
Changing Grip Screws on Your 1911-22 Pistols

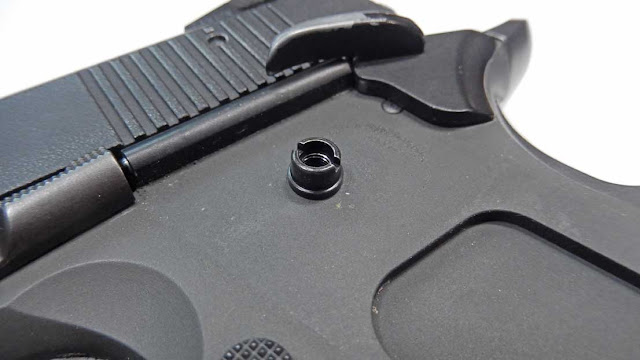
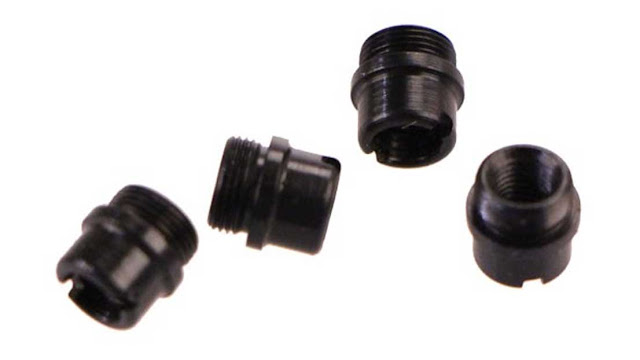
The NicTaylor00 Grip Screw Bushings are specially made to adapt the metric thread pattern on the frame of the gun to the standard thread pattern of 1911 grip screws. By replacing the Bushings found under the grips, the options are endless. Standard 1911 grip screw bushings will NOT WORK on the Colt 1911-22 and the Sig Sauer / GSG (German Sport Gunworks) 1911-22LR pistols.

You can get your Grip Screw Bushings for either the Colt Rail Gun, Gold Cup, Government or the Sig Sauer / GSG 1911-22 imported by ATI at 22LRupgrades.com


Friday, May 10, 2019
AR15 / AR10 Flat Match Quality Trigger for $30!

The Flat Straight Trigger itself is designed to reduce the perceived pressure exerted on your trigger finger making you feel less pressure for each trigger pull.


Adding Reduced Power Springs will give the shooter even a lighter trigger pull. No too mention the trigger itself looks great in the gun.


With drop in match triggers starting at over a hundred dollars, this Skeletonized Trigger with reduced power springs with a price tag of $30 is a great drop in solution for those of us on a budget. You can get yours at Taylor Tactical Supply and don't forget to use the Free Shipping Code GUNSTREAMER for free shipping on your order.
Friday, May 3, 2019
16 Round Magazine Kits for the Smith & Wesson M&P22 COMPACT
For those of us with larger than normal hands, you may find the COMPACT grip a bit small. The added length of the basepad gives your paws more surface area to grip on.
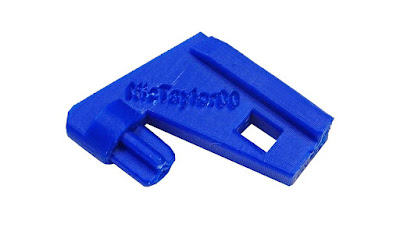
The M&P Compact 22LR pistol uses the little button the side of the factory magazine to engage the slide lock on the pistol. That means when the factory magazine is shot empty, the little button makes the slide stay open on the gun. When you install the 16+1 magazine kit you no longer use that little button so the slide lock on the pistol will not work. However, the NicTaylor "locking follower" is designed to engage the bolt face of the pistol when the mag is empty and thus lock the pistol open. This is similar to how the AR15 22LR conversion kits work. The down side to this is that the mag will not drop free since the slide is resting on the follower. You will have to either pull the slide back and manually engage the slide lock or just push the mag release and pull on the magazine at the same time. If you do not like the locking feature of the kit, you can choose the "non locking follower" that does not engage the bolt face. When the gun is empty, the slide will close and the mag can be dropped free.
If you have bought the 14+1 Magazine Kit for the M&P Compact and want to upgrade to the 16+1 kit, you can get the basepad on it's own and simply replace the factory basepad.
Remember, these kits are for the M&P-22 Compact and not the full sized M&P22. You can get 15+1 and 17+1 magazine kits for the full sized M&P22 at Taylor-Tactical-Supply
Thursday, December 20, 2018
Smith & Wesson 18+1 High Capacity Magazine Modification
But here in particular I wanted to give you a close up look at the 18+1 MAGAZINE UPGRADE KIT for the Smith & Wesson M&P22 pistol. This kit replaces the internal parts of the factory magazine regardless if it's a 10 or 12 round mag. The kit is comprised of a new Hi-Viz follower, extra power magazine spring, aluminum basepad and hex wrench. You can find them HERE

The kit installs in minutes and is reversible if you want to ever convert your magazines back to original configuration. Simply dismantle your factory magazine and bag up everything for storage but the magazine tube. Insert the NicTaylor follower into the magazine tube and then the extra power magazine spring taking note of the orientation of the spring. Compress the spring inside the magazine tube and slide on the anodized aluminum basepad. If for some reason the basepad does not slide on, it may be necessary to remove some of the metal on the little wings of the magazine tube. The magazine tube is stamped and formed sheet metal and the tolerances can vary from mag to mag. Make sure that the spring fits into the inside pocket of the basepad and use the included hex wrench to finger tighten the set screw on the bottom of the basepad.


Draw backs on a kit like this is that it may not be legal in your area. Lots of states and municipalities do not allow magazines over a certain capacity. So make sure you know your areas laws before you install a magazine upgrade. Also we recommend using high velocity ammo for this kit. With so many rounds in the magazine, there is more pressure exerted on the bottom of the slide. This pressure is difficult to overcome as the slide attempts to cycle with the use of some low power ammo. Even with high velocity ammo, the slide may not lock back every time on the last shot fired.
If you live in an area where 15 rounds is the limit for a magazine then you are still in luck. You can get the original 15+1 magazine upgrade HERE And for those that do not have the full sized version of the M&P22, but rather have the COMPACT, you can get a 14+1 magazine upgrade HERE


